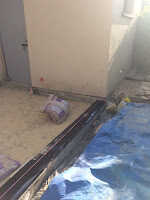
Having hired a professional concrete mixer from Gedimat, which was a boom, the footings foundation was poured and levelled to the correct point to take account of the differing Ground Level that sloped away from West to East by up to 15cm. I had to take into account the new internal floor level that we wanted to be the same as the Utility Room Floor, which is 2cm lower than the current rear door level, which is itself 20cm above the Salon and Kitchen floor level.
I also had to take into consideration the need to install the Concrete Bridge to protect the Fosse and this resulted in me concluding I needed to lay 3 blocks or 600mm above the DPC level after the first layer of 200x200x500 concrete blocks. (which were very heavy to work with!!)
Having laid the first layer of Blocks, I was able to dig out the floor foundation to a depth of 400mm and lay 200mm of hardcore and then 50mm of sand and then place the DPC level and two coats or Bitumeux.
Floor Insulation
Perhaps the easiest part of the job was laying the 4cm of Insulation. This was T&G'd and was the perfect length., so no cutting was needed!


Floor Foundation
Leaving a couple of days for this to settle and the DPC to dry, as well as deciding I needed more sand and gravel, we then mixed and poured the concrete floor. This was more difficult than I had expected and I found out this is most certainly a 2 or even 3 person task and exhausting work.
Linda undertook the task of moving and tampering down the poured concrete and i could have done with a 3rd or even 4th person to mix and load the material.
I turned out to be an 8 hour task and tough. it was not as perfect as I had hoped, but is an excellent job in hindsight. A few low points, but will be sorted when we put down a screed.


Block Wall Level
As mentioned above, 3 layers of blocks were laid to come 600mm above the DPC Level and the went all around the new walls, leaving space for the new Rear Door to be installed, with the associated wood supports and the Roof Supports that would rest on top.


So this concluded the Summer 2018 work and as you will see we have a large pile of stone from the excavation work, much of which will be used to create a low 300mm wall on the west side where a herb garden will be planted and a low 500mm wall od the east garden side to create a courtyard feel at the rear of the garden room that will look out to the garden and the next project, the 'Piggery'.


